Project: https://drive.google.com/file/d/1RRWMh_70Kdk6xVSLfsZ6TRSj9cNXG72f/view
CCR 1: https://youtu.be/ZiqE1zKKuw4
CCR 2: https://youtu.be/DLq2F_mIIVw
So this is it huh? All of that work over the past several weeks and now its over!
Now don't get me wrong, I am very excited to be done with this project. No more stressing over blog posts every week, and no more struggling with editing clips together.
But in a way, I am going to miss this project. Not the project itself, but the filming and creation process was a new fun challenge, and it was very interesting.
From all the highs like finally finishing filming, to all the lows like trying to deal with Adobe Premiere, this project has been a crazy process that has been both frustrating and fun.
 |
| Brady driving on our first filming day |
 |
| Our original storyboard for the project |
 |
| One of our first shots that we filmed |
So now that I've wrapped up filming my CCRs, I have begun the editing process.
Thankfully, the Adobe Premiere Pro features made the editing process easy. I was able to piece together the clips, as well as add images and videos over the clips of me talking to further develop the CCR's.

Now that I have fully edited both of my CCR's, i am able to post them online and I am one step closer to finishing the project!
So this week, I begun filming my Creative Critical Reflections, and thankfully, I had made a few blog posts already to prepare myself for the production process.
However, I changed my mind off of some of my CCR ideas, figuring I should make creations more reflective and creative of my project.
So, I started off filming a therapy scene. This is reflective of the protagonists emotional struggle and problems, fully connecting our film opening to my CCRs.
I asked my mom to help me film the scene, and we were able to use her notebook, not just as a mise en scene element to build the scene, but it also had a few reminders for the questions she had to ask me.
The therapy scene was filmed smoothly, with minimal problems. However, once I started the second scene, which was the schools principal office scene, I had more trouble remembering my lines during some of the takes.
But after a few extra takes, I was able to remember my lines, and we got the scene filmed. The script was a big help towards the process of both scenes, and I am very glad I wrote it before we started.

As assigned for the CCR, we must come up with at least 2 different methods of portraying our CCR through creative methods of display. I have had some ideas that came to mind from the second the option was presented.
Option 1: Post Game Press Conference
As soon as the option was presented to use your own ideas to display your CCR, this is what I have had my heart set on. The concept consists of me, on camera sitting down at a booth with a microphone. A questioner behind the camera, would ask me the CCR questions, and I would answer them. The only issue is creating the design, but I think this would be an excellent idea.


Software Utilization
Our most useful and essential tool has been Adobe Premiere Pro. It has allowed us to assemble our footage, adjust the pacing and mood, as well as incorporate and develop not only our color scheme but also our sound design. We have used it to balance our music with ambient noise. Specifically, our car scenes were shot in the middle of the day, when it was bright and sunny out. But with Premiere Pro, we were able to adjust the lighting, as well as add in new sounds to further develop the scene.
Hardware Incorporation
During the filming process, we did not have too many options when it came to cameras. We had to settle for using an Iphone, which we were able to enhance with a handheld stabler. Because of this, we were able to get smoother motion shots, particularly in the school shots. Our careful use of natural lights is how we developed most ogf our lighting, but a reflector was very helpful in retaining constant lighting during certain tricky scenes.
 |
| Stabler |
To document our production journey, we utilized Blogger, which has served as our primary platform for organizing our research, reflections and behind the scenes content. Posting updates helped us track our progress, allowing us to reflect on potential adjustments and developments. Additionally, we utilized YouTube to research editing techniques, as well as certain lighting decisions during the filming process.
Pre Production and Planning:
To begin, we had a detailed phase of pre production planning, including storyboarding, location scouting, and creating a shot list. This was a crucial stage towards establishing the film's visual style and mood. A big challenge in this stage was the pacing of the shots. Given just 2 minutes to work with, it's difficult to figure out how many scenes to include in that time period. To refine this, we reviewed other film's in a similar genre, to see how they paced their intro's. Creating a shot list and schedule helped streamline the filming and idea process.

 |
| Our storyboard, which helped us prepare for filming. |
Production + Reflection
Our filming process went over pretty well, at least to begin with. We were able to film a majority of the shots at the beginning and end of our project, right away. Some shot's were lacking in theming though. However, by using some careful editing techniques, we were able to overcome this. The MAIN problem we faced, is that with just a few shots remaining to be filmed, which would be taking place at school, I contracted pneumonia and was stuck at home for over a week. This delayed our filming process, and set us behind a bit on editing. However, we were able to film these shots after my return, getting us back on track.
Lessons Learned
This project taught me the importance of adaptability and problem solving on the fly during filmmaking. Planning ahead and creating a schedule is incredibly valuable, but just as important is the ability to refine choices during the production and post production phases. I also gained a deeper respect for how the visual and auditory elements, which may seem minute, are vital in the storytelling process. Overall, my production skills have grown tremendously, and I feel much better about working with film projects in the future.
Creative Critical Reflection: Audience Engagement and Distribution
Our film opening aims to engage with audiences by tapping into universal themes of insecurity, bullying, and hidden struggles, aiming to make it a highly relatable experience for a teenage and young adult demographic. Our main character, a high school bully, has many struggles and aggression problems that stem from his home and personal life. He is not a one-dimensional antagonist, but rather a complex character that provokes an emotional audience reaction. By presenting him and his story using intimate camera choices, color scheming, and sound design we immerse the audience in his emotional turmoil, creating a deeper connection to the story.
Inspiration + Production Connections
To ensure full audience engagement, we drew our inspiration from many coming of age films, with one example being The Perks of Being a Wallflower (2012). The film is able to depict realistic teenage distress through naturalistic effects, and in depth storytelling. We hope to follow in their lead, with use of handheld shots and close ups to capture the personal, relatable nature of the protagonist and his emotions. Our development of the color scheme shifting from cold desaturated tones at school, back to darker more shadowed hues at home reinforces the characters internal conflicts. Sound design is also vital, with the quick switches between the chaotic school sounds, over to the eerie home sounds, and ramped back up with the furious parents.
 |
| The Perks of Being a Wallflower (2012) Opening Scene. Connects feelings of isolation. |
Distribution Strategies
Given our project's independent creation, we would need to be realistic when creating our distribution strategy. Initially, we will release the project on YouTube and Vimeo, while leveraging social media platforms such as TikTok and Instagram to push forward clips and behind the scenes content. Additionally, we would enter film festivals such as the All American High School Film Festival, as well as the Sundance Ignite program, hoping to gain recognition and exposure in the industry.
During the creation process, I looked to challenge the very traditional stereotype of a high-school bully by explaining his motives and background, displaying them to the audience. The audience is aware of this right away. The somber mood mixed with the bully hiding his bruises signals the issues to the audience early, before they see his outward appearance.
Character's like this such as Draco Malfoy from the Harry Potter franchise, and even Gru from the Despicable Me franchise, were helpful guides as characters with tough exteriors who are revealed to have troubled backgrounds, and are hiding softer sides.
 |
| Draco Malfoy (2010) being controlled by his father. |
In our project, one of the main focuses on how to present our film, and fully show the audience our plans, relies heavily on color and how we interpret it in our film. Because of this, we need to be very careful with our decisions.
One of the scenes we knew we would need to utilize Adobe Premiere to edit our project was during the car scene. We knew during filming that the scene needed to be darker than it was being shot at.
We looked around at Adobes integrated filters, as well as all around the options they had, but no luck. Not until we discovered the Lumetri Color tab, which had a slider, which could be adjusted to produce numerous options for colors. Sliding towards the blue just a bit, gave us exactly what we needed! This was a very easy and efficient step of the process.

So this past week we have been assigned to start editing our project, specifically regarding audio.
Beginning with the opening clock scene, we wanted the sounds to increase as the camera got closer to the alarm. Tsis thought came to us during the filming process, and we felt it would compliment the scene nicely. So using Adobe Premiere, we first tried an option called Constant gain, which I thought was working decently, but after my partner Brady and I watched a Youtube Tutorial from Adobe Masters we had a ,uch easier time creating the product we needed

Another key audio we needed to add was the parents yells in the background once the bully arrives at home. We wanted to make sure it was muffled, focusing on the character hearing it while also having thoughts racing through his head. I found a copyright free sound off of a Youtube channel named Free Sound Effects, and Brady agreed it fit perfectly.

[Adobe Masters]. (2013, December 26). KeyFraming Basics in Adobe After Effects CC Tutorial [Video]. Youtube. https://www.youtube.com/watch?v=oGNbFgaVT80
So, we messed up on our previous shoot days.
We both realized that we had made a mistake when we went over the film. Brady pointed out that a few of the shots were a little shaky. It wasn't a huge deal, but we decided to go back and re shoot some of the shots.
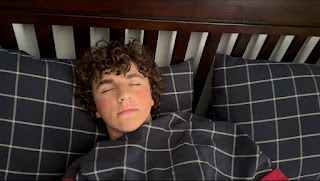
The main issue arose at the beginning of the production, with the zooming clock shot and the matching shot onto the main character waking up. So, we re shot it to make sure it was still, and the following shot as well, making sure they aligned perfectly from the clock to the face.


We are very satisfied with how this came out, and we are glad we took the time to do it.
Welcome back, today is day 3 of our filming process! We had another pretty easy day today, only needing to film a few shots, which all took place in the car.
The firs is a POV shot which looked like a challenge but was actually not too bad. Once again Brady's mom was a huge help, capturing an excellent shot from the back seat while Brady was driving.

We will use this shot, as a way to display the opening title of the movie. We will have to make some changes to the color and tone of this shot during the editing process, in order to fully capture the somber mood dawned on the character while he is on his way.
We then filmed 2 close up shots of the main character while driving that captured his emotions in a very descriptive way.
And that is it for our third day of production! A pretty easy day, but we still have more to film at school which we hope to complete on Tuesday of this upcoming week. Things are going well so far and we hope it continues to do so.
And we're back! We have much shorter of a filming session planned for today with just the ending home scenes on our schedule.
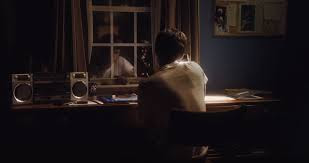
We were back in the main characters room, once again with the dark ominous lighting, reflecting the fear of the main character from his parents impending arrival. However, it was lit slightly upon arrival with some of his school personality remaining lit up.
We displayed the character closing the door nervously, which we did not have any difficulties with, and we fully captured the mood of the anxious protagonist.
Some of our best shots were the over the shoulder shot, as well as the rotating mid shot of the character on the bed.


